Many customers choose to provide their own site survey photos and measurements, which can help move a project forward quickly. A few simple steps can help ensure your proof is as accurate as possible and reduce the need for revisions later on.
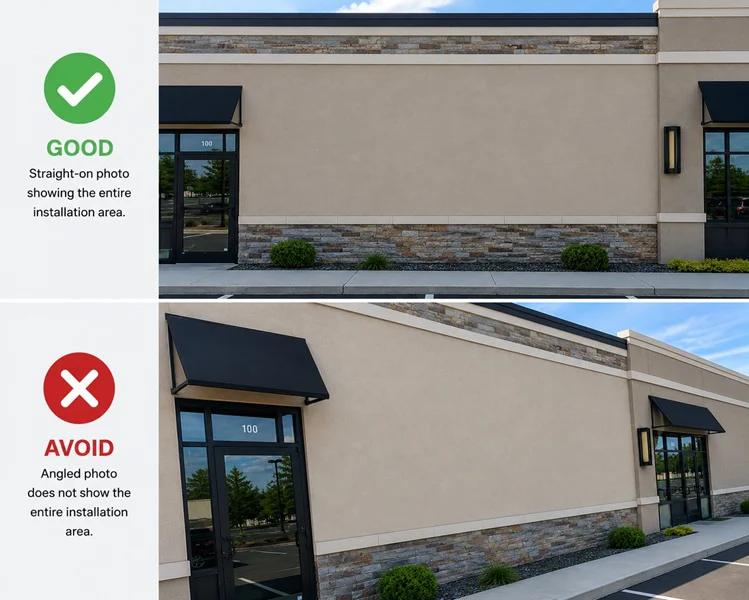
1. Aim Straight – Take Photos Straight On
When photographing a wall, window, or front door, stand directly in front of the area whenever possible.
A straight-on photo provides a clearer view of the available space and helps us better understand where your graphics or signage will be placed. Tip - use the edges of your camera to see if they are “straight”
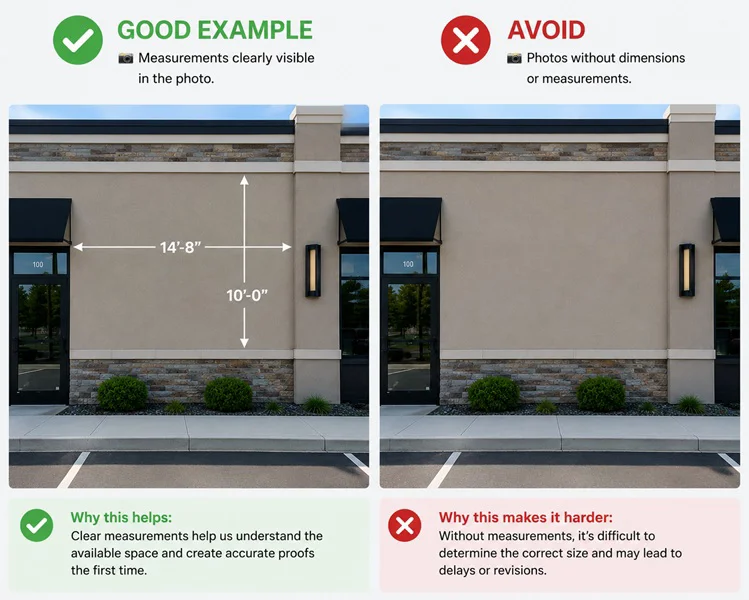
2. Include Measurements
Please include dimensions whenever possible.
Measurements help us understand the available space and create proofs based on the actual installation area.
Helpful measurements may include:
- Window width and height - use “portrait vs landscape” for where you want the final design to look like inside the space
- Wall width and height
- Front door dimensions
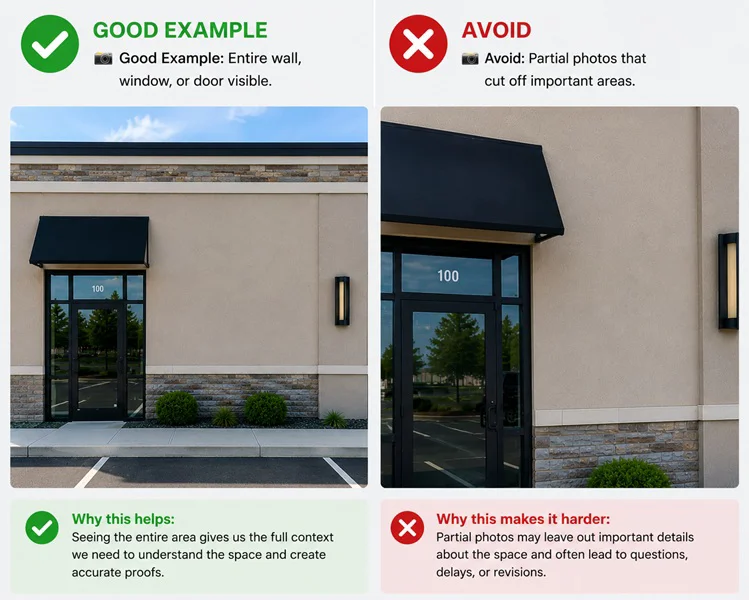
🏢 3. Make the Entire Area Visible
Try to capture the full wall, window, or door in a single photo.
Photos that only show part of the installation area may require additional clarification before a proof can be prepared.
🤝 Helping Us Help You
Clear photos and measurements help us prepare more accurate proofs and reduce the need for revisions.
Remember to A.I.M.:
📸 A – Aim Straight
Take photos directly in front of the installation area.
📏 I – Include Measurements
Provide dimensions whenever possible.
🏢 M – Make the Entire Area Visible
Capture the full wall, window, or door in the photo.
These can help make the process smoother and help us get your project moving faster.
📞 Have questions about your site survey photos? Our team is always happy to help!


